Friday, December 26, 2008
COFFEE COFFEE CAKE, A QUIET CHRISTMAS DINNER, AND A "BOXING DAY" SOUP

 |
| Coffee Coffee Cake (recipe below), the traditional Christmas breakfast cake in my family. |

Printable Recipe
BRYANNA'S VEGAN CREME OF ARTICHOKE AND MUSHROOM SOUP WITH PESTO
Servings: 4
An easy and delicious soup utilizing some of my favorite ingredients.
2 tablespoon olive oil
1 1/2 cups fresh crimini or white mushrooms, chopped
1/4 cup chopped onion
2 tablespoons white unbleached flour
6 cups nondairy milk (I used soy)
2 tablespoons Better Than Bouillon No-Chicken Soup Base
(OR enough good-tasting vegetarian chicken-style bouillon cubes or powder for 6 cups liquid)
2/ 14 oz. cans artichokes hearts in water, well-drained and chopped
(OR use two 9 oz. pckgs. frozen artichoke hearts, thawed, drained and chopped)
2 tablespoons non-dairy basil pesto
salt and finely-chopped black pepper to taste
a little more pesto to swirl on top for a garnish
Heat the olive oil in a 2 quart pot. Add the mushrooms and onion and stir-cook over medium-high heat until the onion is translucent, about 5 minutes.
Stir in flour and stir-cook for 1 minute.
Vigorously stir in the nondairy milk and bouillon and let it come to a boil, stirring. Cook 1 minute, stirring consistently. Add the artichokes, reduce the heat to a simmer and cook, uncovered, for 5 minutes.
Stir in the Pesto and taste for seasoning. Serve immediately.
Nutrition Facts
Nutrition (per serving): 285.1 calories; 27% calories from fat; 9.0g total fat; 0.0mg cholesterol; 3578.0mg sodium; 1272.9mg potassium; 44.1g carbohydrates; 12.9g fiber; 14.5g sugar; 31.2g net carbs; 22.3g protein; 5.6 points.

Printable Recipe
BRYANNA'S VEGAN COFFEE COFFEE CAKE (Updated Dec. 24, 2016)
Servings: 8
Yield: One 9-inch round cake
This is a veganized version of a not-too-sweet coffee-flavored coffee cake that I've been making for years (started out with a non-vegan recipe in Sunset magazine) and make for every Christmas breakfast (and my adult kids carry on with the tradition, too). It's delicious!
THE CAKE BATTER:
Wet Mix:
1/2 cup (4 oz.) medium-firm regular tofu (or firm to extra-firm silken tofu)
1 tablespoon Ener-G or Orgran No-Egg egg replacer powder
1/3 cup brown sugar
2 tablespoons dark roast,good-quality instant coffee granules OR 1 tablespoon espresso powder
1/2 teaspoon pure vanilla extract
Dry Mix:
2 cup whole wheat pastry flour
1 tablespoon baking powder
1/2 teaspoon salt
Additional:
1/3 cup nondairy milk
THE NUT FILLING:
1/3 cup vegan butter
1/3 cup brown sugar
1/4 cup wheat germ (or whole grain flour)
3/4 cup coarsely chopped walnuts or pecans
THE COFFEE GLAZE:
3/4 cup organic powdered sugar
1 tablespoon strong liquid coffee (preferably espresso) OR 1 tablespoon hot water with 1 teaspoon dark roast, good-quality instant coffee granules)
Preheat oven to 350°F.
Oil a 9-inch round cake pan and line with baking parchment cut to fit the bottom of the pan. Combine the Wet Mix ingredients in a food processor and process until well-combined. It might look a bit curdled-- that's okay!
In a small bowl whisk together the Dry Ingredients.
Add the half of the Dry Mix to the Wet Mix in the food processor and pulse just to mix. Add the 1/3 cup nondairy milk and pulse to mix (stop the processor and scrape down the sides if necessary), then add the remaining Dry Mix, and process until well-combined-- no longer! It's quite a bit thicker than a layer cake batter, but moist.
Combine the Filling ingredients in a small bowl with a fork and/or your fingers until well mixed. It will be soft and sort of cling together-- it isn't crumbly.
Spread half of the Batter evenly into the pan with your damp fingers. Distribute half of the nut filling evenly over the batter in bits-- there will be some gaps between the "bits". Smooth the rest of the Batter over the Filling, and then distribute the remaining Filling over the top in the same way. Press it down slightly into the batter.
Bake the cake for 25 minutes. Cool it briefly on a rack, then loosen the sides with a table knife and turn out onto a plate, if you like (it can also be served directly from the pan).
Mix the Coffee Glaze ingredients together in a small bowl until smooth. Drizzle or spread the Coffee Glaze over the top of the warm cake and serve warm or at room temperature.
Nutrition Facts
Nutrition (per serving): 337.7 calories; 43% calories from fat; 16.2g total fat; 0.0mg cholesterol; 293.4mg sodium; 463.6mg potassium; 44.3g carbohydrates; 4.3g fiber; 18.1g sugar; 40.1g net carbs; 6.4g protein; 7.3 points.
Happy Holidays!

Thursday, December 25, 2008
MERRY CHRISTMAS FROM MY HOUSE TO YOURS!

"Nonna's house in the woods", as my 4-yr-old grandson calls our house
HAVE A WONDERFUL HOLIDAY!

Tuesday, December 23, 2008
A VERSATILE LOW-FAT CREAMY PASTA SAUCE FOR QUICK MEALS BETWEEN FEASTS

This isn't a Christmas or holiday recipe, but we do need some quick meals between cooking, cleaning, shopping, feasting, and present-wrapping! The following sauce is great to have in your fridge, or to whip up literally in minutes, and use to create a yummy pasta dish in teh time it takes to boil the pasta!
Have a wonderful holiday!
Printable Recipe
BRYANNA’S QUICK CREAMY SAUCE FOR PASTA
Yield: 4 1/4 cups
This recipe (adaptedfrom my first cookbook, “The Almost No-Fat Cookbook”) is one of the most versatile and effortless sauces around, so don't be afraid to make this large amount. It can be used in a number of pasta dishes, and leftovers can be used in creamy soups and casseroles, to moisten stuffed baked potatoes or mashed potatoes, on vegetables..etc..
1 1/2 cups cold water
12.3 oz (1 a box) of extra-firm SILKEN tofu OR (for soy-free) 1 1/2 cups cooked or canned, rinsed and drained white beans, packed down
1/4 cup dry white wine
OR 3 tablespoons water plus 1 tablespoon balsamic vinegar or lemon juice
1/3 cup nutritional yeast flakes
2 tablespoons cornstarch
1 1/2 tablespoons "chicken-style" veggie broth powder or paste
2 teaspoons salt OR 2 tablespoons light miso plus 1 tsp. salt
2 teaspoons garlic granules or powder
1 1/2 cups hot water
OPTIONAL: 2 T. tahini
Combine in a blender the first 1 1/2 cups water and all of the rest of the ingredients EXCEPT the 1 1/2 cup HOT water.
When the mixture is smooth, pour it into a heavy saucepan or a medium microwave-proof bowl. Whisk in the 1 1/2 cups hot water.
Stir constantly over high heat until it comes to a boil. Turn down and simmer for a few minutes, until it thickens.
MICROWAVE OPTION: Pour the blended mixture into a large microwave-safe bowl. Cook, covered, on High for 3 minutes. Whisk well and cook, covered, on High for 3 more minutes, or until thickened. Whisk well.
Nutrition Facts (with no tahini)
Nutrition (per 1/4 cup): 24.8 calories; 16% calories from fat; 0.5g total fat; 0.0mg cholesterol; 251.2mg sodium; 96.0mg potassium; 2.8g carbohydrates; 0.8g fiber; 0.3g sugar; 1.9g net carbs; 2.8g protein; 0.4 points.
PASTA ENTREES USING QUICK CREAMY SAUCE
You don't really need a recipe to make a variety of tasty dishes with pasta of all types and Quick Creamy Sauce-- just use your imagination. One recipe of sauce is enough for 2 lbs. of tossed pasta, or 1 lb., if the sauce is going to be cooked into it like a casserole (the pasta “sucks” up the sauce when it’s baked!)
NOTE: Pasta also really soaks up this sauce as it cools, so you'll have to add a bit of water, broth or nondairy milk when reheating leftovers.
You can toss the sauce with pasta and add chopped cooked (fresh or frozen) vegetables, such as frozen chopped spinach (well-squeezed), arugula or other greens, peas, asparagus, onions and cabbage, broccoli; sauteed or grilled mushrooms; grilled or roasted vegetables; rehydrated (or marinated) and sliced sundried tomatoes; roasted peppers or rinsed marinated artichokes from a jar; strips of any cooked vegan chicken substitute or commercial marinated tofu; strips of vegetarian "deli meats" or seitan; chopped fresh parsley and other herbs; dairy-free pesto; vegetarian "Italian sausage", cooked and crumbled; hot tomato salsa or drained canned diced tomatoes; etc…..
For a Spaghetti a la Carbonnera-like dish, toss the sauce with 2 lbs. of spaghetti, freshly cooked, 1/4 cup of soy bacon chips or 1 cup of diced vegetarian "ham" or "bacon", and add lots of freshly-ground black pepper and vegan parmesan to taste. I like to also add some barely-cooked frozen petit pois (baby peas).
For "Straw and Hay", follow the Carbonnera recipe above, but use half regular and half spinach fettucine with the sauce, adding the peas.
For Southwestern Pasta, mix your favorite pasta shape with the sauce, chopped tomatoes, canned corn, sauteed onion, garlic, and zucchini, and some chile flakes (or maybe some salsa). Another option is roasted bell pepper strips (any or all colors).
For Creamy Green Pasta, add lots of steamed, chopped greens (squeezed dry) to the sauce.
For Pasta ala Primavera, add grilled vegetables—red pepper strips, diagonally-cut asparagus, mushrooms, broccoli, cauliflower, etc., and perhaps frozen baby peas or snap peas, which you can throw into the pot with the pasta as it boils, during the last couple of minutes. Add freshly-ground black pepper and soy parmesan.
Happy Holidays!
Thursday, December 18, 2008
LAST-MINUTE, LOWFAT VEGAN FRUITCAKE IN WINTER WONDERLAND
 |
| Fruitcake I made yesterday. |


It's beautiful-- I'll grant you that! But it's very hard to get around in. The West Coast is not prepared for lots of snow for long periods of time. Side roads (we live on one) don't get plowed for days; snow on the sides of the roads just piles up and never gets taken away; some roads don't get sanded. Our driveway is long, steep and curvy. We walk it right now. Oh, well-- at least our pipes haven't frozen and the power is on! We are snug and warm and have lots of food. It could be worse. I just wish I didn't have to go anywhere until it goes away.
ABOUT THAT FRUITCAKE....
Yesterday I felt that I should bake something Christmasy. I've avoided baking because I'm trying to lose weight. And, also, rich desserts bother DH's digestion. So I made my fruitcake, which is pretty low in fat and made with healthful ingredients.
Growing up with in California with a Mom who didn't bake much and a Peruvian father, I didn't have much exposure to traditional fruitcake. When I first tasted it I thought it was awful--heavy, stodgy. (And I've always hated candied citron.) Eventually, I invented my own sort of fruitcake years ago-- moist and rich-tasting, but minus the eggs, butter and, worse yet, suet, like many traditional recipes. I based it on an old wartime "boiled raisin" cake.
It's also easy to make and you don't have to chop the dried fruit and nuts, which is a a time saver. I leave them whole so that, when you slice the cake, you get a "stained-glass window" effect. You can make this cake at the last minute, because it doesn't need to be stored for long periods of time to develop flavor."
This is a dark fruitcake, which I prefer, but you can make a light fruitcake by omitting the spices and using all light organic sugar instead of brown sugar and molasses. Then use light-colored or red dried fruits, like pineapple, mango, pear, apple, apricots,cherries, cranberries, etc. for the fruit.
If you like, you can wrap the cooled loaves in liquor-soaked cheesecloth inside zipper-lock plastic bags and keep them for several weeks, or skip the liquor-soaked cheesecloth, in which case they should be frozen after about 1 and 1/2 weeks.
I have been making this as my Christmas cake for many years. I hope you like it!
Printable Recipe

BRYANNA'S LOW-FAT VEGAN CARROT FRUITCAKE
BOILED MIXTURE:
1 1/2 cups water or apple juice
(Instead of 1 1/2 cups liquid, you can use 1/2 cup liquor of choice, such as rum or brandy, + 1 cup water or juice)
1 cup grated scrubbed carrots
1 cup raisins
1 cup brown sugar
1/4 cup molasses
1 teaspoon ground cinnamon
1 teaspoon salt
1/4 teaspoon ground cloves
1/4 cup oil (for an even lower-fat cake, omit the fat and use 1/4 cup smooth, unsweetened applesauce)
DRY INGREDIENTS:
1 1/2 cups wholewheat flour (regular, not pastry flour)
1/2 cup wheat germ OR oat flour (grind rolled oats in a dry blender)
1 teaspoon baking soda
DRIED FRUITS AND NUTS (for an even lower-fat cake, cut down on, or omit, the nuts, and add more dried fruit):
1 cup whole pitted mixed dried fruits (such as prunes and apricots)
1 cup whole pitted dates
1 cup dried currants (or use dried unsweetened cranberries)
1/2 cup chopped walnuts
1 cup whole shelled unsalted mixed nuts
Bring the Boiled Mixture ingredients to a boil together in a medium saucepan, then reduce heat and simmer for 10 minutes. Set aside to cool.
Preheat the oven to 300 degrees F.
In a large bowl mix together the dry ingredients, then add the cooled Boiled Mixture and the dried fruits and nuts.
Mix well and spoon into two 3 x 6" loaf pans (fruitcake pans) and one 8 x 4" loaf pan, nonstick or lightly-oiled or sprayed and lined on the bottom with waxed paper or cooking parchment (or one 7-8" tube cake pan). Bake the small loaves for 45 minutes and the larger loaf for 60 minutes. Invert on racks to cool. Carefully peel off the paper.
Servings: 36
Yield: 2/ 3x6" loaves + 1/ 8x4" loaf OR one 7-8" tube cake
Nutrition Facts (calculated using oil and nuts)
Nutrition (per serving): 124.6 calories; 33% calories from fat; 4.9g total fat; 0.0mg cholesterol; 92.7mg sodium; 209.7mg potassium; 19.7g carbohydrates; 2.0g fiber; 12.5g sugar; 17.6g net carbs; 2.5g protein; 2.5 points.

Happy Baking!

Tuesday, December 9, 2008
MY NEW MINI SUPERPEEL, CRAFT FAIR ON DENMAN IS., MORE WAYS TO USE MY WHOLE GRAIN SOURDOUGH PANCAKE BATTER, AND A SPREAD TO USE ON IT!
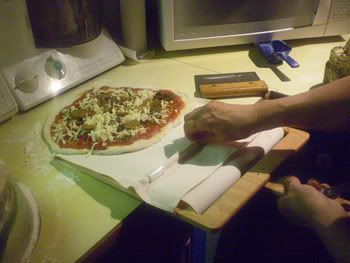
Using my new Mini Super Peel to load the pizza onto the peel.
NOTE: This is a long mish-mosh of stuff today! I'm going to be pretty busy until next week, so I thought I'd just post everything I have!
I was fascinated by the Super Peel, The Ultimate Baker's Transport Tool. It's a fantastic way to get pizza, bread, and other baked goods from the counter, onto the peel, and then onto a baking stone or pan without messing up your masterpiece! You can read all about it on the website.
My problem was that I bake my pizza in my Cuisinart Brick Oven-- a counter-top oven with a 12" square interior. (Read about it here.) The Super Peel is 14" square. So, I wrote to Gary, the owner, just to suggest that he might think about making one that fits in popular smaller ovens. Well, he made me one-- as a prototype only, but he will probably be making them for sale soon, so keep an eye on his website! I got it last week (my Christmas present a little early!) and it works beautifully! It also looks pretty neat:
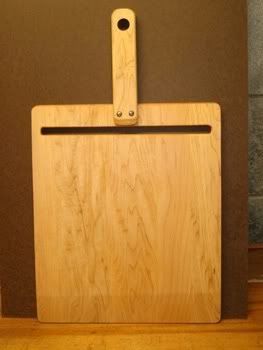
Here it is without the cloth:
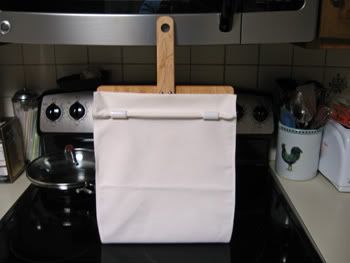
And here it is with the cloth:
Here are some more comments from happy bakers.
You can watch videos of how it works here.
THE CHRISTMAS CRAFT FAIRE ON DENMAN ISLAND...it's a 2-day affair, a Christmas tradition, with great arts and crafts-- really high quality. My granddaughters made homemade lollipops, candied apples, and other treats to sell at the children's booth.
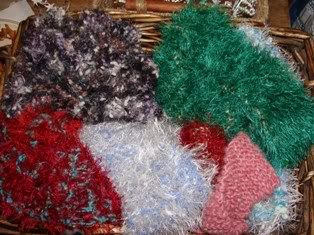
The scarves-- made by my 9-year-old grandaughter and her friend!

Our friend's Bev's lovely pottery display
Jacquie's funky French fry stand

My talented good friend and dance teacher Bronwyn with her beautiful pottery and tiles.
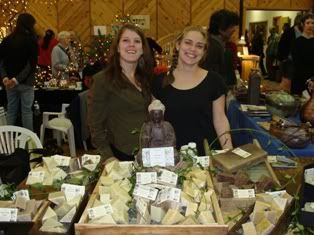
Two of our young friends, Leticia and Tasha, with their yummy-smelling handmade soap--cocoa, chai spices, coffee...
MORE WAYS TO USE MY WHOLE GRAIN SOURDOUGH PANCAKE BATTER... I am really happy with my vegan, whole grain pancake batter. It's light and delicious.
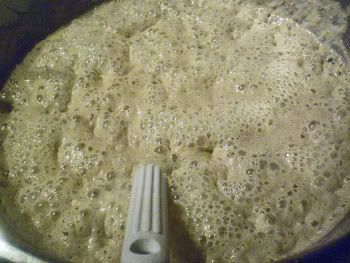
Really bubbly whole grain pancake batter!
I've been keeping a wholewheat starter or two just for that recipe, so that it's all-whole grain.
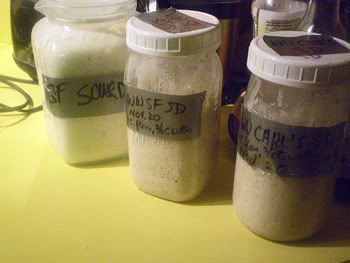
If you are unfamiliar with sourdough, see http://veganfeastkitchen.blogspot.com/2006/04/1906-earthquake-in-sf-my-grandfather.html My San Francisco starter, how to make it vegan and how to use and care for it is at that link. I actually have two vegan sourdough starters-- both are very reliable. I also use the "Oregon Trail Sourdough Starter", which I treat the same way. You can get a free (dried) starter (and it's a great story that goes with it!) here. You just pay postage. (PS: I don't use the sugar and potato they call for in the instructions., and it works fine.)
If you would like a longer version of all this info, with recipes, write to me via my contact page.
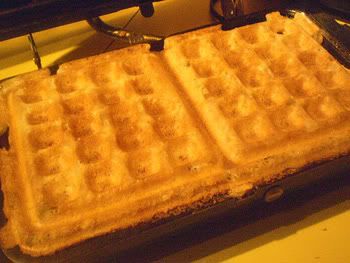
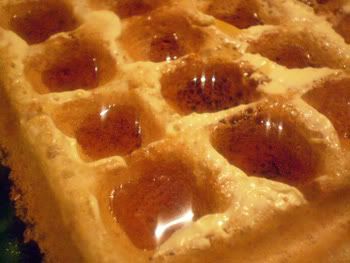
I made delicious waffles with the same batter (nonstick waffle maker with oil spray just to be safe!):
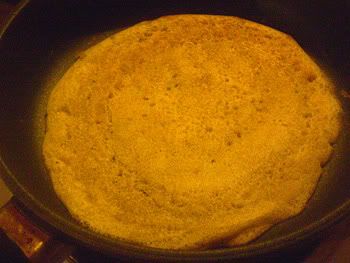
And, when the extra batter had been in the fridge for a couple of days and thinned out, I made crepes with it:

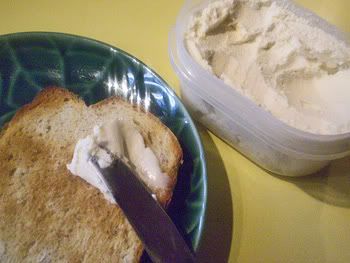
NOW, ABOUT THAT SPREAD... We like my Coconut-Corn Buttery Spread, but sometimes, for a treat, I make the following spread, adapted from a recipe in my book Nonna's Italian Kitchen. It just makes vegan margarine into a homemade reduced-fat spread, but it's quick, easy, cheap, and you know what goes into it!
Printable Recipe
BRYANNA'S HOMEMADE REDUCED-FAT VEGAN BUTTERY SPREAD Yield: 1 1/4 cups
This easy, homemade spread contains half the fat of butter or margarine, but spreads and melts nicely, and tastes great. 1 serving= 1 tablespoon
10 tablespoons (1/2 cup plus 2 tablespoons) nondairy milk
10 tablespoons(1/2 cup plus 2 tablespoons) palm oil-free vegan buttery spread (try my homemade Buttah)
4 teaspoons Instant Clear-Jel
OR 1/4 teaspoon xanthan gum
1/4 teaspoon lemon juice
1/8 teaspoon salt
Mix the ingredients together in a food processor and whiz until very smooth. Scoop into a covered container and refrigerate until firm.
Nutrition Facts
Nutrition (per tablespoon): 54.2 calories; 93% calories from fat; 5.6g total fat; 0.0mg cholesterol; 76.0mg sodium; 9.5mg potassium; 0.7g carbohydrates; 0.0g fiber; 0.2g sugar; 0.7g net carbs; 0.2g protein; 1.5 points.
Cooking Tips
INSTANT CLEARJEL®
Instant Clearjel® is a modified corn starch, which simply means that it is precooked, used to thicken recipes. And the vegan ice cream made with it does not crystallize, or get rock-hard. It's creamy, and has no starchy mouth feel.
For clump-free, smooth results: "...it is best when first combined with dry ingredients, before adding liquid. It will begin to swell or thicken as soon as it is added to water, milk or juices; it will impart a smooth, short texture when fully hydrated, reaching its full thickness within 5-10 minutes (without requiring any cooking). Instant Clearjel® can be used in cooking as well. The viscosity will increase slightly upon heating. It has excellent heat and acid resistance and can be used in acid containing foods and in those applications where heating is required. It has good cold temperature storage stability, making it particularly well suited for refrigerated and frozen foods." http://recipes.wikia.co/wiki/Instant_Clearjel®
America's Test Kitchen recommends it for fruit pies, BTW.
It isn't available on store shelves-- here in Canada I had to get 11 lbs. of it from a bakery supply company (Snowcap), but maybe a bakery would sell you a smaller amount. You can now order it in Canada from the Gourmet Warehouse (Vancouver):
n the US, you can mail-order it from (and I believe that they all ship to Canada): amazon.com
Barry Farm and
King Arthur Flour
Enjoy!
Thursday, December 4, 2008
LOW-FAT, VEGAN ASPARAGUS AND MUSHROOM SHEPHERD'S PIE

I'm home with a cold-- at least one that is trying to take hold and I'm fighting it. So, I thought I'd share a recipe I made recently that is yummy and comforting on a miserable December day.
The recipe is adapted from one in Cook's Illustrated magazine (and you'll see the original recipe reproduced-- un-attributed, unfortunately-- around the 'Net). I veganized it, used more asparagu, fewer mushrooms, and far less fat. I compensated for all the missing fat by using a tiny bit of tasty dark Chinese sesame oil, and adding some dried porcini mushrooms and their soaking water. Very delicious and comforting, indeed, and about as elegant as a Shepherd's Pie can be.

Printable Recipe
BRYANNA'S LOWER-FAT VEGAN MUSHROOM AND ASPARAGUS SHEPHERD'S PIE
(Gluten-Free)
Servings: 5
Mashed Potatoes:
3 lbs. Yukon Gold potatoes
3/4 cup plain (original) nondairy milk
salt and freshly-ground black pepper to taste.
Filling:
1/4 cup dried porcini mushroom slices
1 lb asparagus, trimmed, cut into 1" pieces
1 teaspoon dark sesame oil
1 lbs + 6 oz. (22 oz.) mushrooms of your choice (I used cremini-- you can use a mixture, if you like), cleaned, stemmed, if necessary, and cut into 1/2" chunks
2 cloves garlic, chopped
1/2 cup sliced veggie "ham" or "bacon" (optional)
1/2 a small onion, chopped
1/4 cup green onions, thinly sliced
5/8 cup medium dry sherry
1 cup porcini mushroom soaking water
1/2 cup hot water
1 mushroom bouillon cube, or 1 teaspoon mushroom broth powder or paste (enough for for 1 cup broth), crumbled (see here)
3 tablespoons tomato paste
1/2 teaspoon dried thyme
1/2 teaspoon salt
1 teaspoon potato starch dissolved in 1 tablespoon cold water
freshly-ground black pepper
paprika or smoked paprika (smoked pimenton)

Make the mashed potatoes as follows, or, for the best, fluffy "butter-y" low-fat mashed potatoes, see the recipe here.
Peel the potatoes and cut into equal-sized chunks. Steam them or cook in simmering water to cover until tender but not mushy. MICROWAVE OPTION: Place potato cubes in a large Pyrex casserole, cover and cook on 100% power (no need to add water) for about 6 minutes; stir the cubes and cook about 4 minutes longer, or until the cubes are soft enough to mash. (This option saves not only time, but alot of energy, and you lose no nutrients in water.)
Drain and mash the potatoes well with a potato masher or ricer. Add the nondairy milk and beat well with a wooden spoon. Season to taste with salt (do not omit the salt!) and freshly ground black pepper. Cover and set aside.
To make the Filling:
Soak the dried porcini mushrooms in about 1 1/2 cups of boiling water, covered, while you proceed with the next few steps.
Steam the asparagus until bright green and crisp-tender. Spray with cold water from the tap, drain and set aside.
Add the sesame oil to a large, non-stick, hard-anodized, or cast iron skillet over high heat. Add the mushrooms, onions, and garlic. Stir-cook over until browned mushroom have released their juice. Add splashes of hot water as needed to keep from sticking or drying out, but don't use much. Add the veggie "ham", if using, and the green onions, and stir-cook until the mushrooms start to brown. Transfer them to a bowl and reserve.
Strain the porcini mushrooms and save 1 cup of the soaking water. Stir the porcini mushrooms into the cooked mushroom mixture. Mix with the hot water and mushroom bouillon cube until it dissolves. Whisk in the tomato paste.
Reduce the heat to medium-high. Add the sherry and deglaze the pan by scraping up any browned juices with a wooden spoon. Boil until the liquid is reduced to a syrupy glaze. Add the mushroom soaking water/broth /tomato paste mixture, salt and thyme. Simmer for a few minutes, and then whisk in the potato starch mixture. The sauce will thicken quickly, as potato starch only needs to heat up, not cook, in order to thicken. Add the cooked asparagus and mushroom mixture to the sauce. Taste for seasoning. Pour into a 2 qt. baking dish or gratin dish.

Heat the oven to 375°F.
Drop spoonfuls of the mashed potatoes on top of the mushroom filling and spread them gently to form an even (but not too smooth) layer.

Spray the potatoes with oil from a pump-sprayer and sprinkle with paprika or smoked paprika (pimenton). Bake in the hot oven until the potatoes are golden on top and the filling is bubbling, 25 to 35 minutes.
Nutrition Facts
Nutrition (per serving): 428.9 calories; 3% calories from fat; 1.7g total fat; 0.0mg cholesterol; 374.1mg sodium; 2921.7mg potassium; 84.1g carbohydrates; 8.4g fiber; 6.2g sugar; 75.7g net carbs; 18.2g protein; 7.9 points.
Enjoy!

Sunday, November 30, 2008
NEW AND IMPROVED OKARA PARMESAN!
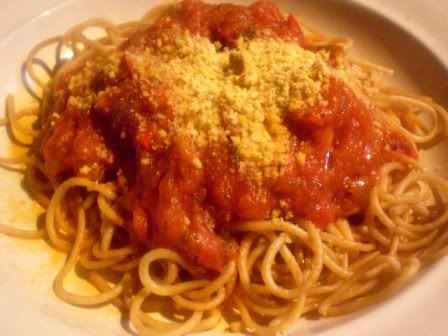
Back in May, I developed a recipe for a vegan "parmesan" utilizing dried okara-- the residue or pulp leftover from making soymilk or tofu. It was not bad, but I have been wanting to improve on it. I love Galaxy vegan soy parmesan, but it is only available in Canada online at one venue that I know of and is kind of pricey, considering how much I like to use it! That's my motivation for coming up with something I really like.
So I started playing with the recipe the other day, adding ingredients I thought would improve both flavor and texture. I like to add miso to my vegan cheeses for a fermented flavor, but you can't add much to a vegan parmesan made out of a light powdery substance, such as dehydrated okara, because it will make it soggy. So, I decided to dehydrate some miso for this recipe, in order to add more flavor. Miso powder does exist, but I have never been able to find it in my area. It was easy to make in an inexpensive home food dehydrator, and the directions are in the recipe.
So, here is the improved version, and I hope you'll like it! It contains more calories, due to the almonds and sesame seeds, but I think the calories are worth it! The recipe also uses up the okara from 2 batches of soymilk-maker okara, squeezed as dry as possible in a cloth (this is important!). The recipe makes 4 cups, which makes your effort worthwhile, too!
Printable Recipe
BRYANNA'S NEW AND IMPROVED OKARA PARMESAN SUBSTITUTE
Yield: 4 cups
Updated Sept. 10, 2010
This is a great way to use up okara, the residue from making soymilk. This really looks like grated cheese and tastes "cheesey" (the dried miso powder adds a fermented flavor). It shakes out easily, too. This makes quite alot , but keeps well in the refrigerator.
2 2/3 cups dried okara (about 4 cups fresh, squeezed dry in a cloth--this is the amount from 2 batches of soy milk using my new, richer soy milk recipe)
(see Cooking Tips below for how to dry okara)
1 1/3 cups blanched, slivered almonds OR 1 1/2 cups raw cashews (raw or lightly toasted)
1 cup nutritional yeast flakes
2/3 cup raw sesame seeds
3 tablespoons miso powder (see Cooking Tips below)
1 tablespoon garlic granules or powder
1/2 tablespoon salt
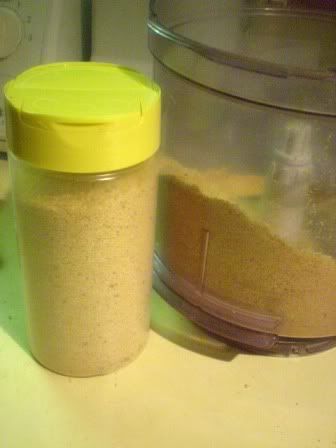
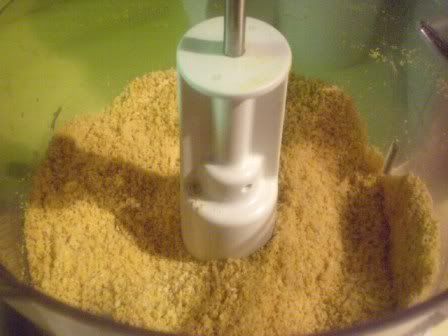
Process all of the ingredients in a dry food processor until it looks about the consistency of parmesan. You don't want a powder-- you want a little texture. You can use a DRY blender, but you'll have to watch the texture closely.
Place some in a covered container or shaker, and the rest in a ziplock bag, and keep refrigerated. (Make sure that the container is tightly closed so that no moisture gets in while in the refrigerator.)
Nutrition Facts
Nutrition (per 2 tablespoons): 79.0 calories; 48% calories from fat; 4.6g total fat; 0.0mg cholesterol; 182.5mg sodium; 182.3mg potassium; 6.6g carbohydrates; 2.1g fiber; 0.4g sugar; 4.5g net carbs; 4.6g protein; 1.5 points.
COOKING TIPS
DRYING OKARA:
If you have a large amount of okara, you can use a food dehydrator (use fruit-leather liners, or make a liner with cooking parchment), or spread it on cookie sheets and set it in the oven at its lowest temperature, with the oven door cracked open a little to let out moisture, until dry, stirring now and then.

To dry a small amount in a microwave oven:
Get a microwave-safe plate, or use the carousel in your microwave. Line it with two sheets of paper toweling (this will absorb the moisture), and top that with a piece of cooking parchment cut to fit (this will keep the okara from sticking as it dries). Spread the okara evenly on that, breaking up clumps as much as possible. Leave a space in the center empty (it burns easily in the center of the plate).
Microwave at half power (#5) in 5 minutes increments, stirring after each one, until dried. I took away the paper toweling after the first 5 minutes because it was quite wet, and replaced it with new paper toweling.
Let it cool thoroughly before using or storing (in zip-lock bags).
DRIED MISO POWDER:
This company makes freeze-dried miso powder. You may be able to find miso powder in a Japanese or Asian grocery store-- I'll have a look next time I have a chance. I wasn't going off-island when I made this recipe, so I made some myself.
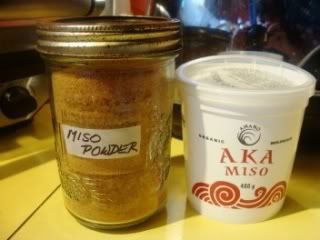
HOMEMADE MISO POWDER:
(400g or 14 oz. of miso make about 2 cups of powdered miso.)
You might as well make a whole bunch of miso powder at one go-- it keeps well if very dry and airtight.
I used a cheap little home food dehydrator with 2 trays. You could probably use the oven or microwave methods, as well. Check the dried okara notes above for directions. You'll have to dry the miso in small "dabs".

This is the whole 400 g carton of miso on one tray.
When the miso is shrunken and partially dried, break it up a bit more. I broke it up in the Vita-Mix until it was almost powdery-- more granulated, really-- and ten spread it back on the drying tray. Continue drying until you feel no moisture.
When it is dried and cooled off, grind it in a DRY Vita-Mix or other heavy-duty blender, or in small amounts in a DRY electric coffee/spice mill until powdery. If there are any hard resistant bits which refused to be pulverized, you can sift them off. Store in a tight jar or zip-lock bag.
Cheers!
Tuesday, November 25, 2008
A JAPANESE-THEMED VEGAN DINNER PARTY
HAPPY THANKSGIVING, MY AMERICAN FRIENDS!
Full plates!

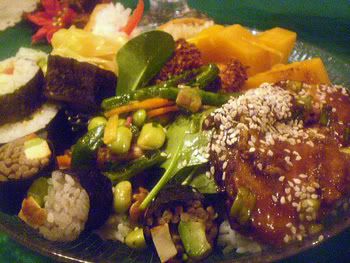
My full plate!
DH and I were invited to a vegan dinner party Sunday night. Our hosts chose a Japanese theme. It was a fun night-- great company and conversation in a lovely setting, wonderful hosts, some lovely Japanese music, and fabulous food (sake, too, if one was so inclined!). We all had the same thought-- "If only all those doubting omnivores, thinking us so deprived, could join us!"
Here are the highlights:


Some cute, colorful sushi that E. made especially for DH (who isn't fond of seaweed), rolled with "Soy Wraps" instead of nori.


I also made small ganmodoki-- Japanese fried tofu patties, traditionally made by Japanese tofu makers with day-old tofu (recipe below).
For dessert, P. brought a lovely vegan chocolate cake topped with fruit from Whole Foods (incredibly large boysenberries!), and I got brave and made a modern Japanese dessert!


I got the idea for this dessert from a Japanese cookbook (Washoku by Elizabeth Andoh-- not vegetarian but a lovely book), but, of course, used vegan waffles (this recipe would work well with this dessert, and you can also make waffles with this recipe, or this one, or this one). I also made the vegan vanilla gelato (the recipe is here-- just leave out the applesauce and amaretti crumbs!). Red bean jam or sweet red bean paste are used in many Asian desserts. We westerners often profess not to like it, so it was a gamble, but everyone loved it.
If you would like to recreate this recipe, you can use the recipes I noted above and view the recipe for Chunky Red Bean Jam for that recipe here, and the recipe for the Black Sugar Syrup here.
Here's the recipe for the tofu patties:
Printable Recipe
BRYANNA’S GANMODOKI (JAPANESE TOFU PATTIES)
Makes 8-12
From my book “Soyfoods Cooking for a Positive Menopause”.
This simple tofu dish is made every day in tofu shops in Japan, using the remaining tofu that was made the day before. These patties are usually deep-fried, but can be successfully shallow-fried or oven-fried. They are delicious cold or hot and will keep one week in the refrigerator. They make great snacks and day-hiking food, too.
You can use large patties like regular burgers, or small patties as appetizers. You can eat them plain or with soy sauce, chutney, ketchup, salsa, etc.. Cold ganmodoki can also be sliced and added to Japanese-style soups and stews (oden), or braise whole cold ganmodoki patties for 4-5 minutes in a mixture of 4 C. water, 1/4 c. Japanese soy sauce or tamari, 1/4 c. dry sherry or mirin (Japanese rice wine), and 1 T. unbleached sugar.
10-12 oz. firm tofu
2 T. grated carrot
2 T. grated fresh ginger
2 T. minced onion, green onion, or leek
2 T. frozen baby peas (petit pois), thawed
2 T. lightly-toasted sesame seeds
3/4 tsp. salt
OPTIONAL: 2 T. chopped mushrooms (preferably fresh shiitake or soaked dried shiitake or Chinese forest mushrooms-- discard stems)
cooking oil for frying or brushing
Crumble the tofu very finely, or process in a food processor. Add the remaining ingredients and knead together by hand or in the food processor until it holds together. Form into 8 to 12 patties (or more tiny ones for appetizers) with smooth edges.
To shallow-fry, heat about 1/2-inch of cooking oil in a frying pan over medium-high heat. Add the patties and fry til golden and crispy on one side. Turn over and fry until the other side is golden and crispy. Drain on paper towels.
To oven-fry, preheat the oven to 500 degrees F. Place the patties on dark oiled cookie sheets and brush or spray with a little cooking oil. Bake about 6 minutes per side, or until golden and crispy on both sides, and slightly puffed up.
Enjoy!!

Subscribe to:
Posts (Atom)